The reports module is new with version 3 of LogAnalyzer. It supports HTML and PDF output and can be fully parameterized. For example, Adiscon LogAnalyzer can be used to analyze user account logons over a specific time frame, system and network errors can be identified or a status report of the whole network be generated. And at it bests: once configured, reports can be sent automatically by email in a daily, weekly or custom interval.
To use the reports-module, you need to have some requirements to fulfill. You need a working installation of LogAnalyzer, a user with admin privileges in LogAnalyzer and a data source, preferably already filled with log data. When you have all this done, you can start creating your reports.
 First of all use the Login Button to log in to your account. You can directly go to the admin center. As you can see, you get a new menu with a lot of submenus for customizing your configuration. But this is all not so interesting right now. All except the Report Modules. Click on the “Report Modules” button to get to the configuration menu. There you will find a overview of the installed reports.
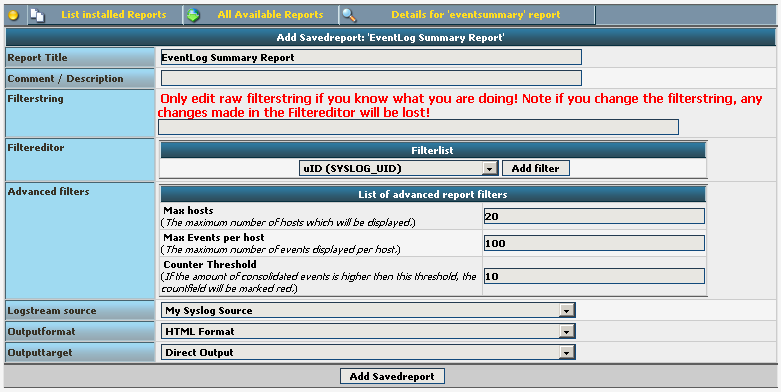
 By clicking on “Add Savedreport” at the report you want to configure, you get to a configuration window.
 Here you can set various details like the name and description of the report, configure a filter for the report or set the Data Source you want to use and the output format. Simply save this report by clicking on “Add Savedreport”. You will be automatically redirected to the report overview and your new report is ready to use.
 Now you can directly test the report by clicking the green arrow on the right. The report will be generated and (depending on your settings) stored or opened.
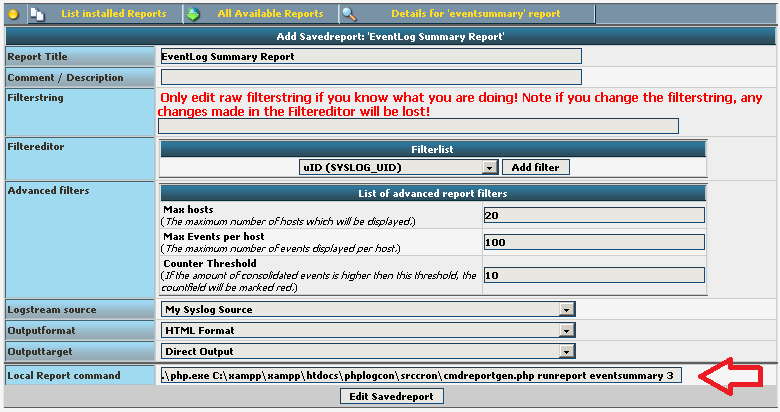
If you want to schedule the report to be automatically generated, click on the name of your configured report. You get to the configuration window again. At the bottom of the form, you see a line with a console command.
 This is automatically generated when saving the report the first time. With this command line you can create a cron job or a scheduled task, which allows you to automatically generate the report at specific time intervals as you need it. If you want, you can even send the report automatically via email.